
A good solar installation photo checklist follows the job in stages: before installation, structure, electrical, commissioning and handover. At each stage, take a wide shot that shows where you are, then a close shot of the detail that cannot be checked later. Take it before that detail is covered, bolted over or switched on. This post is for EPC (engineering, procurement and construction) teams and installers on rooftop and ground-mount sites. It gives a shot list per stage, notes to say on site, and what to do with no signal.
Why solar jobs need photos at every stage
A solar plant hides its own work. Foundations are poured and forgotten. Earthing strips go under soil. DC cables run behind panels and inside conduits. Once the array is up, nobody can see what was done underneath it.
That is why questions arrive late. A client asks whether the foundation depth was followed. A DISCOM (electricity distribution company) engineer asks which inverter was installed. A PMC (project management consultant) asks why a stage was billed before it was finished. Without a dated photo, your answer is a memory, and the crew has moved to the next site.
The standard for grid-connected PV documentation, IEC 62446-1, describes the information a customer should receive at handover, along with commissioning tests and inspection. It is written for designers and installers. Photos are not a substitute for those tests, but they show the installation the tests were run on.
With proof and without
- Without: photos arrive on WhatsApp days later, in mixed order, with no site name. The date is whatever the phone says.
- With: each photo is taken live, stamped with GPS and time, and sits in one job record in stage order. A query is answered by opening the record.
Before installation: what to photograph
This stage records the starting condition. It protects you from claims that you damaged something, and it supports your design assumptions.
- Site wide shot: the roof or plot from the access point, showing the full area, with a landmark so the location is clear.
- Roof surface or ground condition: waterproofing, cracks, parapet, water tanks, existing damage. For ground-mount, slope, vegetation and drainage.
- Shadow sources: trees, nearby buildings and tanks that fall on the planned array area, taken from the array position.
- Existing electrical point: the main panel with its door open, showing the breakers and the incoming supply.
- Existing meter: the consumer's meter, with the number readable.
- Delivered material: panels stacked on arrival, with the module label and any carton damage visible.
- Access and safety: the ladder, the fall-arrest anchor point and the barricading, where applicable.
If material arrives damaged, take the photo before you sign for it. A later photo will not show who broke it.
Structure and mounting: rooftop and ground-mount
This stage is hidden first. Photograph it before panels cover it.
Rooftop
- Anchor points: each base plate or clamp position, with the fastener in place and the sealing visible.
- Rail layout: a wide shot along the rails before modules go on, showing alignment and spacing.
- Roof penetrations: the sealing around every drilled point, close up.
- Ballast, if used: the blocks in place, wide and close.
Ground-mount
- Foundation excavation: the pit with a tape or marked rod showing depth, before concrete or ramming.
- Reinforcement and concrete: the cage before the pour, then the finished footing.
- Pile or pier row: a wide shot along the row showing line and level.
- Fencing and gate: the perimeter and the entrance.
Modules
- Tilt and orientation: a side view of the array, taken from the same spot as the earlier wide shot.
- Module fixing: a close shot of the clamps and any torque marking you use.
Follow the structure maker's manual for torque and fixing details. Photograph what the manual asks you to do, not a number from a blog.
Electrical: earthing, DC and AC cabling, inverter serial
Electrical work hides in trenches, conduits and enclosures. Take each shot before it is covered or closed.
- Earthing pit: the pit, the strip and the connection, before it is covered, then a wide shot showing where the pit sits against the array or building. Follow your design drawing and the code it names.
- Equipment bonding: the earth connection on the structure, the module frames and the inverter body.
- DC cabling: routing along the rails, the clips, the conduit entry and the string labels.
- Connectors: a close shot of the joints at the string ends, before they are tied up.
- DC isolator and combiner box: open with terminations visible, then closed with its label.
- AC cabling: the cable from the inverter to the AC panel, with conduit, glands and cable tags.
- Protection devices: the breaker ratings in the AC panel, readable on the device.
- Inverter: the whole unit mounted, then the nameplate with the serial number readable. Shoot it straight on, with no glare.
- Module serial numbers: the labels, where the scheme or the client asks for them.
The nameplate shot matters most. Serial numbers are the first thing a reviewer compares against the invoice and the scheme record.
If the inverter gives a display reading at start-up, capture it in a short video rather than a still. Video with audio lets you say the inverter model and the string being tested.
How to do it with Verafii
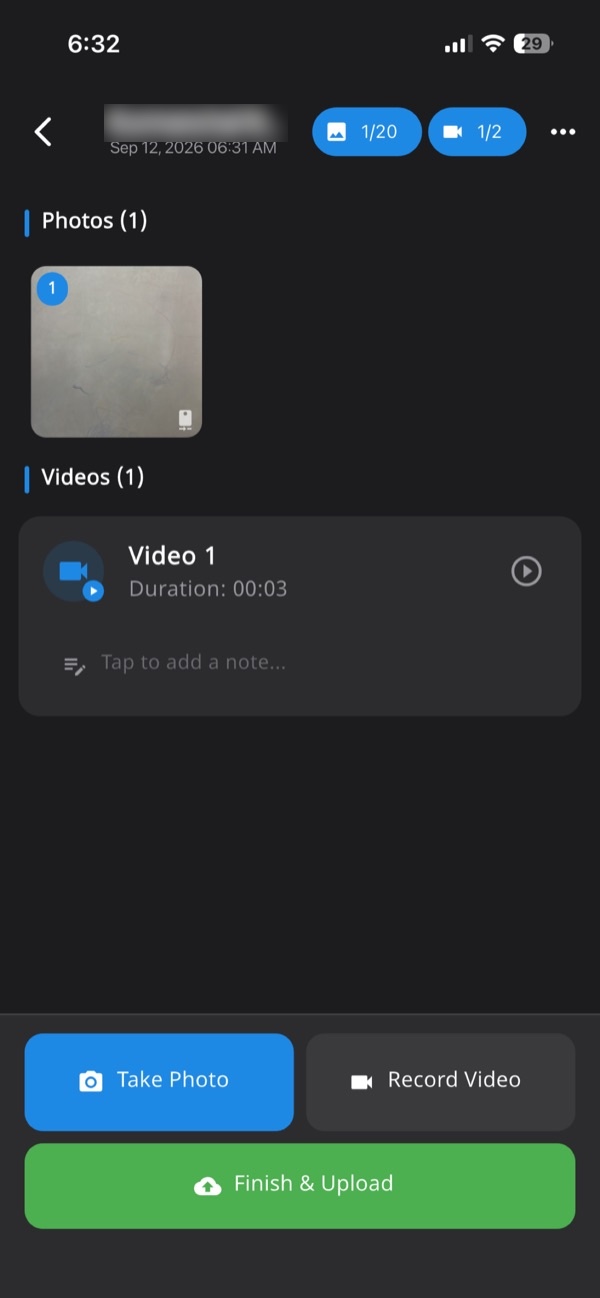
Verafii is a camera and report app. It captures photos and video live, stamps each with GPS and time, and puts them in one job record. These steps assume your admin has set up your account. Button names can differ by version, so follow the labels on your screen.
- Open Verafii and start or open the job for the site, so every photo lands in the same record.
- Capture each stage with the in-app camera. There is no gallery or file picker, so you cannot add an old photo.
- Take the wide shot first, then the close shot. Each photo is stamped with GPS and time at the moment you press the shutter.
- Add a short note: the stage, the string or the pit number.
- For a start-up display, record live video with audio and say what the viewer is looking at.
- Before you leave the site, review the numbered photos in the job record. Retake anything blurred while you are still there.
- Make the one-tap PDF report, branded with your company logo, with location, device, time and a QR code.
Anyone can then scan the QR to open the public verification page, or drop in the file they received. No account or app is needed. See check a Verifafii report for the steps, or the solar installation photo report page.
If a photo is taken with a fake location, Verafii flags it on the photo, the report, the verify page and the dashboard, on both Android and iPhone. A flag is a reason to ask, not proof of fault.
Commissioning and net meter
Commissioning is when the plant is tested and switched on. For a grid-connected system, it ends with a net meter and the DISCOM's inspection. IEC 62446-1 describes the commissioning tests and the documents that go with them. A competent person carries out the tests with the right instruments.
- Test instrument screens: the reading on the instrument, with the string or circuit named in the frame or in a note.
- Inverter display: the first production reading, in a photo or short video.
- Generation meter and net meter: the meter fixed in place, the seals, and the serial number and opening reading readable.
- Protection panel: the closed and labelled AC panel.
- Array with the building: a wide shot of the finished plant, from the same position as the earlier wide shot.
- Warning labels and single-line diagram: displayed near the equipment, where your design requires them.
For rooftop schemes, installation details, photos and the DISCOM's inspection go through the official portal. Steps and file rules change, so read them on the National Portal for Rooftop Solar and your DISCOM's own page before you upload.
Verafii does not upload to any government portal and does not replace an official app. You capture in Verafii, then upload what the portal asks for, in the way it asks. For a defect fix after commissioning, see PM Surya Ghar geo tagged photo proof for defect fixes.
Handover: notes, report and who sees what
Handover is where the photos turn into a report the customer keeps.
- Final wide shot: the completed plant, with the building or plot.
- Inverter and meter nameplates: one last readable shot of each.
- Customer at the plant: only if the scheme or the customer asks for it, and ask the customer first.
- Loose ends: any item left for later, photographed and noted, so it is not mistaken for a defect.
For the report layout, use the work completion report format for contractors as a guide.
What to say or write on site
Give the foreman one line: every photo needs the stage, the location on the site and the item. Notes like these work:
- Rail layout, row 3, before modules
- Earth pit 2, strip connected, before backfill
- Inverter nameplate, serial readable
- Net meter, opening reading, seals fixed
Field, office, client
- Field: the installer captures, retakes blurred shots, and makes the PDF before leaving.
- Office: the admin reviews the job record against the checklist and sends the report.
- Client: the client scans the QR or drops in the PDF to check it was not changed.
A customer signature in the report is an add-on, available on request and charged on top of the plan.
No signal on the roof: working offline
Many roofs, plots and basements have poor mobile coverage. Verafii works offline: you capture photos and video with no signal, and the job uploads when the phone is back online.
- Keep capturing: do not wait for signal, and do not switch to the phone's normal camera.
- Charge the phone: a dead battery stops the work, signal or not.
- Check before you leave: confirm the job shows as uploaded once you have coverage, before the phone is switched off or reset.
- Expect drift: GPS can be off by some distance near tall buildings or under metal roofing. A single odd location is a reason to ask the person, not to accuse them.
Make the PDF once the photos have synced. If the phone is still offline when the crew leaves, finish the report at the first place with signal.
What photos can't show
Photos are evidence of what the camera saw, at a place and time. They are not a test.
- Electrical performance: a photo of a meter shows a number. It does not show insulation, earth resistance or string health. Those need instruments and a competent person.
- Hidden depth and quality: a photo of a pit shows the pit at that moment. It cannot prove the concrete mix or what happened after backfilling.
- Intent: a photo cannot show why something was done.
- Acceptance: whether a DISCOM, a scheme office, a client or an insurer accepts a photo is their decision. A report shows what was captured, where and when, and whether the file is unchanged.
- Gaps: if nobody photographed a stage, nothing can be recovered afterwards.
Verafii also cannot make a poor photo good. A blurred nameplate stays blurred, and reports and watermarks are in English, even though the app has 11 languages. Check your design, the maker's manual and your DISCOM's rules for exact values.
The solar installation photo checklist
Print this or keep it with the job record. As of 7 November 2026, no single official list covers every state and scheme, so adapt it to your contract.
- Before: site wide shot, roof or ground condition, shadow sources, existing panel and meter.
- Material: panels and inverter on delivery, damage shown before you sign.
- Structure: anchors or foundations before cover, rail layout, module fixing.
- Earthing: each pit before backfill, plus the bonding on the structure and inverter.
- DC side: routing, string labels, connectors, combiner box open and closed.
- AC side: cable route, glands, breaker ratings, labelled panel.
- Inverter: mounted unit and readable serial nameplate.
- Commissioning: test screens, first production reading, meter serial and opening reading.
- Handover: final wide shot, loose items noted, report made before leaving.
- Review: every photo has a note, and nothing is blurred or missing.
Frequently asked questions
What photos are needed for a solar installation?
There is no single list for every state or scheme, so check your contract and DISCOM. A sound set covers the site before work, structure, earthing, DC and AC cabling, the inverter serial, the meter and the finished plant. IEC 62446-1 describes the documentation a customer should receive at handover.
Should I photograph earthing pits before they are covered?
Yes. Once backfilled, the pit and strip connection cannot be seen. Take a close shot of the connection and a wide shot of the location. Follow your design drawing and the code it names for the details.
How do I capture the inverter serial number clearly?
Stand straight in front of the nameplate, avoid glare and fill the frame. Check on screen that the serial can be read before you move on. Add a note naming the unit if the site has more than one inverter.
Can I take solar site photos with no mobile signal?
Yes, with Verafii. It captures photos and video offline and uploads them when the phone is online again. Make the PDF report after the photos have synced.
Does Verafii upload photos to the PM Surya Ghar portal?
No. Verafii does not upload to any government portal or replace an official app. You capture and report in Verafii, then upload what the National Portal for Rooftop Solar asks for, as it asks.
Will Verafii make sure my photos are accepted?
No. Whether a DISCOM, client or insurer accepts a photo is their decision. A Verafii report shows each photo's GPS, time and device, flags fake locations, and lets anyone check that the file is unchanged.
Can photos replace commissioning tests?
No. Photos show what the installation looked like and what instruments displayed. Commissioning tests need instruments and a competent person, as described in IEC 62446-1.
Try it on your next solar site
Start the 30-day free trial and run this checklist on one rooftop or ground-mount job, with a call at the end to decide whether to continue. Or ask for a quote. The price depends on your team: field agents, admin users, how long evidence is kept, and photo and video quality.
