
Take photos at every stage that will be hidden or measured later: the existing room, layout marking, work behind the ceiling, wiring before plaster or cladding, waterproofing before tiles, carpentry carcasses and the finished room. Each photo needs the date, the place and a note saying which room and stage it shows. This checklist is for interior contractors, site supervisors, designers and clients. It covers what to frame, what to write on site, who does what, and what photos cannot prove.
The ceiling closed before anyone photographed it
A carpenter finishes the gypsum false ceiling in a living room on a Friday. The painter starts on Monday. Two weeks later the client's designer asks where the cove light wiring runs, and whether the extra points in the bedroom were done as agreed.
Nobody has a photo. The supervisor remembers the work, the electrician remembers it differently, and the client was not on site. Opening the ceiling means cutting finished work, repainting and a second round of arguments.
This is the ordinary interior fit-out problem. Work is built in layers, and each layer hides the one before it. A short photo routine at each stage costs minutes and answers most of these questions. The rest of this post gives that routine.
Why undocumented stages cost money and rework
Interior jobs have many trades in a small space. Carpenter, electrician, plumber, tiler and painter follow each other within days. A gap in the record usually turns into one of these costs.
- Opening finished work: a ceiling, a wall panel or a floor is cut to check something that one photo would have shown.
- Disputed extras: the client says a point or a cabinet was in the original scope. You say it was added. Without dated photos of the earlier state, both sides argue from memory.
- Stage billing questions: a running bill (RA bill) claims a stage as complete, and the person approving it was not there. See our routine for running bill photo proof.
- Blame between trades: a cracked tile or a drilled pipe could belong to any of three crews.
- Slow handover: the client walks the flat, finds a list of doubts and holds the final stage until each is settled.
Photos do not remove these disputes. They give everyone the same record to start from.
With stage proof and without
| Without stage photos | With stage photos | |
|---|---|---|
| Hidden wiring question | Open the ceiling or wall | Look at the dated photo |
| Extra work claim | Memory against memory | Photo of the room before the extra |
| Stage approval | Approver must visit | Approver reviews the set first |
| Trade blame | Guesswork | Photos show who finished when |
| Handover | Long walk and long list | Walk with the record in hand |
The photos only help if they are clear, labelled and taken live. A folder of forwarded pictures with no dates settles nothing. Our post on why WhatsApp isn't enough for progress photos explains why.
The photo standard: one stage at a time
For every stage take three kinds of photo. A wide shot from the door shows the whole room. A close shot shows the detail. A scale shot puts a tape, a marker or a labelled board in frame. Repeat the same corner for the wide shot at every visit, so the room can be compared over time.
Existing condition, before you start
Photograph each wall, the ceiling, the floor, windows, and any existing cracks, damp patches or damage. This protects you from being blamed for what was already there. It also fixes the scope the client signed off on.
Layout and marking
Show chalk or paint lines for partitions, ceiling levels, cabinet positions and electrical points on the floor or wall. Include a tape reading the key dimension. Mistakes found here cost nothing to fix.
False ceiling
Take photos at three points.
- Framing: the grid or channels with the level lines, before boards go on.
- Services above: wiring, AC pipes, ducts and fixtures sitting in the void, before closing.
- Closed ceiling: the board joints and the cut-outs for lights and vents, before putty and paint.
The middle photo is the one people ask for later. Take it from several angles, with a torch if needed.
Electrical
- Conduit routes: the chased walls with conduit laid, before plastering.
- Boxes and points: each switch box with a note of its room and position.
- Distribution board: the open board with circuits labelled, and the finished label card.
- Earthing connection points that are visible, before they are covered.
For how to show hidden work, see our post on proof of concealed work photos.
Waterproofing and tiling
- Surface preparation: the bathroom or balcony floor before the coating.
- Coating: each coat, and the edges turned up the wall.
- Water test: the flooded floor with the water level marked and the date in view. A second photo after the test period shows the same level.
- Tile layout: the first row, the slope toward the drain, and the joints.
- Finished tiling: wide and close shots, with a straight edge on the floor to show levels and lippage.
Carpentry and modular work
- Carcass: the frame or box before shutters and finish, with the room and unit label.
- Fittings: hinges, channels and hardware fitted, with a close shot of any special hardware.
- Finish: shutters and laminate, with a close shot of edges and corners.
- Alignment: a straight shot along a row of shutters to show gaps.
Painting and final finish
Shoot each wall in raking light so unevenness shows. Take close shots of corners and edges, switch plates, and the junction of ceiling and wall.
Handover set
Take one wide shot of each room from the door, then fixed points: light fittings, taps, switches and appliances. Add any known open items with a note. A full set at handover is your record of how you left the room.
How to do it with Verafii
Verafii is a camera and report app. Photos and video are taken live in its own camera, so there is no gallery to pick from. Each photo has the GPS position and time burned into the image at the shutter. The steps below follow one site visit.
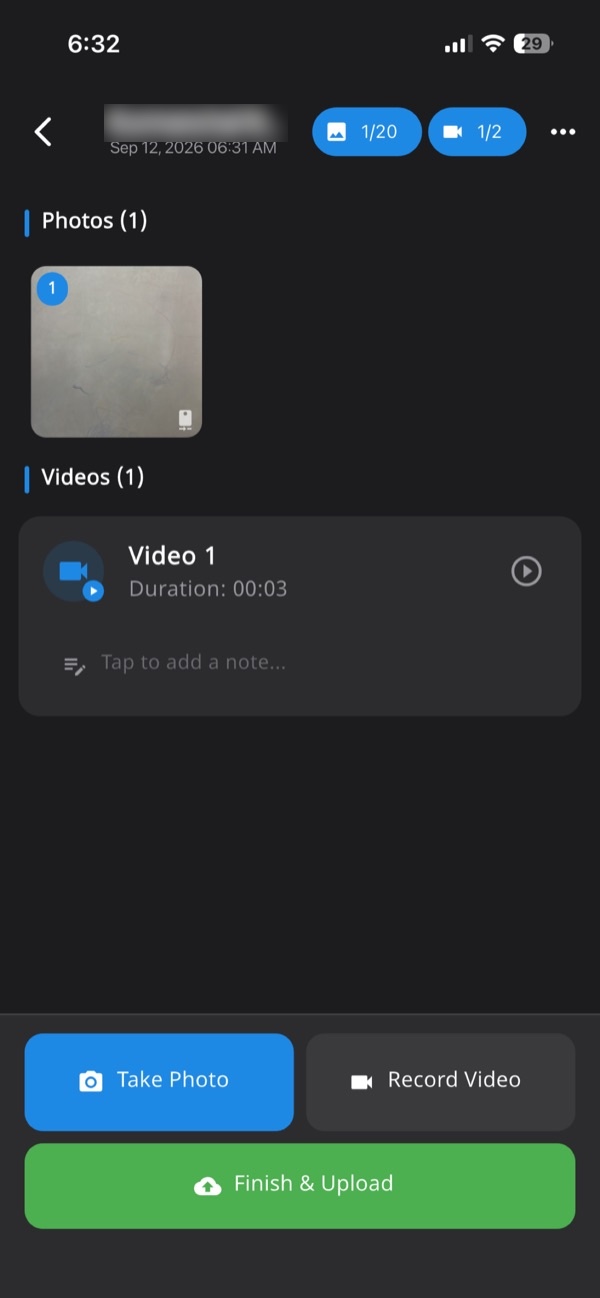
- Open the job for the site. Every photo, video and note you add lands in one session, numbered and tied to that site.
- Take the wide shot of the room from the door, then the close shots of the stage you are checking.
- Add a note for the room and stage while you are standing there, using the one-line format in the next section.
- Repeat for each room in the same order as last visit.
- Record a short video with audio where a walk-through explains more than a still, for example the ceiling void.
- Make the PDF report with one tap before you leave. It carries your company logo, location, device, time and a QR code.
- Send the report to the designer or client. If your company has asked for the customer signature add-on, the client can sign in the app and the signature goes in the report.
Anyone with the report can scan the QR to open a public verification page, with no account and no app. You can read more at check a Verafii report.
The customer signature is an add-on available on request. It is not part of the plan.
What to say or write on site
Give the foreman one rule: no photo set without a note. A photo without a note is a picture of a wall. A photo with a note is a record.
Use one line in this order: room, stage, what is visible, anything unusual.
- Master bedroom, ceiling, services above, AC pipe and 4 light wires before board closing.
- Kitchen, wall, conduit laid, before plaster, 3 points above counter.
- Bathroom 2, floor, water test day 1, level marked at 25 mm.
- Living room, TV unit, carcass fitted, shutters pending.
- Bedroom 3, wardrobe, client asked to move the shelf; old position visible.
The last note matters. When the client changes something, say so in the note and photograph the earlier state. That is the evidence for an extra later.
Keep the notes plain. Do not write what the work proves. Write what is in the picture.
Site supervisor, designer, client
Site supervisor
You take the photos and write the notes. Do it at the end of each stage, before the next trade arrives. Check that every room in the set has a wide shot. Make the report before you leave, not at night from memory.
Designer
You review the set against the drawings. Look for the hidden stages first: ceiling void, conduits, waterproofing. Ask for a re-shoot of anything unclear while the stage is still open. Use the same room order each time so changes are easy to see.
Client
You do not need to be on site for every stage. Ask for the report at each stage, scan the QR to check it, and raise doubts before the next layer goes on. If you are taking possession, our flat possession snagging checklist covers the buyer's side.
What photos can't show
Photos are evidence of what was visible at a moment. They have limits, and you should say so to the client.
- Material quality: a photo cannot show whether the board, plywood or laminate is the grade ordered. Keep bills and batch labels, and photograph those labels.
- Thickness and dimensions: unless a tape or gauge is in frame and readable, a photo cannot prove thickness.
- Electrical safety: a photo of wiring does not show insulation, load or earthing performance. Only testing by a qualified person does.
- Waterproofing performance: a photo of a coating is not a leak-proof guarantee. The water test result and time are what matter.
- Unit-level location: GPS drifts inside apartments and towers. Treat the position as the building or the site, not the floor or flat. The room is in your note.
- Who did the work: a photo shows the work, not which worker did it.
Whether a client, designer or other party accepts a photo as proof is their decision. Verafii can show a photo was taken live, with a time and a place. It cannot make anyone accept it.
The stage checklist
Use this at each visit.
- Existing condition: every wall, ceiling and floor photographed before work starts.
- Layout: marked lines for partitions, points and cabinets, with a tape in frame.
- Ceiling framing: grid and level lines, before boards.
- Ceiling void: wiring, pipes and fixtures, before closing.
- Conduits: laid routes and boxes, before plaster.
- Distribution board: open, with labelled circuits.
- Waterproofing: each coat, edges, and the water test with level and date.
- Tiling: first row, slope, joints and finished floor.
- Carpentry: carcass, fittings and finish for each unit.
- Handover set: one wide shot per room, fixtures, and any open items noted.
Frequently asked questions
Which stage photos should an interior contractor take?
Take the existing room, layout marking, the ceiling void before closing, conduits before plaster, waterproofing and its water test, tile layout, carpentry carcasses and the finished room. Hidden stages matter most, because nobody can check them later without opening finished work.
How many photos do I need for each stage?
Three kinds are enough: a wide shot of the room, a close shot of the detail and a shot with a tape or marker in frame. Add a short note for the room and stage. More photos help only if each one is clear and labelled.
Can GPS prove which flat or floor a photo was taken in?
No. GPS drifts inside apartments and near tall buildings, so it shows the site or building at best. Write the flat, floor and room in the note, and keep the same order in every report.
Can photos prove the electrical work is safe?
No. A photo shows what the wiring looked like, not its insulation, load or earthing. Safety needs testing and inspection by a qualified person. Use photos to show the routes and boxes before they were covered.
How do I record extra work the client asked for?
Photograph the room before the change, then write the request in the note, for example that the client asked to move a shelf. Photograph the changed work afterwards. The dated set shows what was original and what was added.
Will Verafii make sure my photos are accepted?
No. Whether a client, designer or anyone else accepts a photo is their decision. Verafii shows that photos were taken live in its camera, with GPS and time stamped in, and a QR lets anyone check the report.
Can the client sign the report in the app?
Yes, if your company has asked for the customer signature add-on. The client signs in the app and the signature goes in the report. It is available on request and is not part of the plan.
Try stage photos with your own crew
Run one site through a full stage cycle with Verafii on the 30-day free trial. If you want a plan for a larger team, ask for a quote. The price depends on your team: how many people capture on site, how many review, how long you keep records, and photo and video quality.
