
An installation completion report has five parts: a details block, a list of work done with photos, test readings, notes on open points, and the customer's sign-off. Fill it before you leave the site, while the equipment is still in front of you. This guide is for service managers and technicians handing over CCTV, lifts, inverters, AC units or network gear. It shows each part, what to photograph, and how to keep the report hard to change afterwards.
The installation completion report format in short, by situation
The same five parts work for every trade. What changes is the test section and the photos.
- Before the visit: prepare the details block from the work order, so the technician only confirms it on site.
- During the visit: capture photos as each stage finishes, and note readings as you take them.
- At handover: walk the customer through the finished work, record open points, and take the sign-off.
- After the visit: send the report the same day, while the customer still remembers what was agreed.
A short report that is complete beats a long one that is half empty. One or two pages is usually enough for a single-visit installation.
The details block: job, site, technician, date
This block lets someone who was not there find the job again months later. Keep it at the top of the first page.
- Job reference: the work order, ticket or invoice number.
- Customer and site: the name, the full address, and the person you handed over to.
- Technician and team: who did the work, and who supervised.
- Date and time: start and finish, written as "9 November 2026".
- Equipment: make, model and serial number of each unit installed.
- Scope: one line on what was ordered, such as "8 cameras, 1 NVR, cabling".
Copy serial numbers from the plate, not from the delivery challan. A mismatch between the two is a common cause of later warranty disputes.
The work and photo section: what to show
List each item installed, then give it one clear photo. Add a second photo only where it answers a likely question.
- Serial number plate: readable, with the unit visible behind it.
- Finished install: the unit fixed in place, showing mounting and clearances.
- Wiring and terminations: neat dressing, labels, earthing, before any panel or false ceiling closes. Our post on proof of concealed work photos covers this.
- Power-on state: the display, indicator lights or login screen.
- Wide shot: the whole area, so the unit can be placed in the room.
One photo per item, numbered in order, is easier for a customer to follow than forty loose pictures. Place and time stamped on each image help if the visit is questioned later.
Test readings and notes
Photos show that something was fitted. Readings show that it was tested. Write each as a value with a unit, the instrument used and the time.
- CCTV: each camera's view confirmed, recording on, and retention days set.
- Lift: door operation, levelling at each floor, safety devices tested, and who tested them.
- Inverter or solar: input and output voltage, and the display showing output.
- AC: supply voltage, gas pressure if measured, and temperature drop at the outlet.
- Network: link status, speed test result and the ports used.
These are examples. Use the checks your maker or your own procedure asks for.
Notes and open points
Write what is not finished, in plain words. "Cable tray cover pending, materials awaited" protects both sides. Add training given, passwords handed over, and the warranty or AMC start date if it applies. Our post on preventive maintenance report photos shows how to carry this into later visits.
Customer sign-off: what to record
The sign-off is the customer saying that they saw the work and the handover took place. It does not mean they waive later defects, unless your contract says so.
- Name and designation of the person signing.
- Date and time of the sign-off.
- Signature, on paper or in an app.
- Remarks: any complaint the customer wants recorded. Do not remove them.
If the customer is absent, do not sign for them. Record who received the handover and send the report to the customer the same day.
How to do it with Verafii
Verafii's camera takes photos live inside the app, so the report is made from pictures taken at the job. You can use it for the photo, record and report parts of this format.
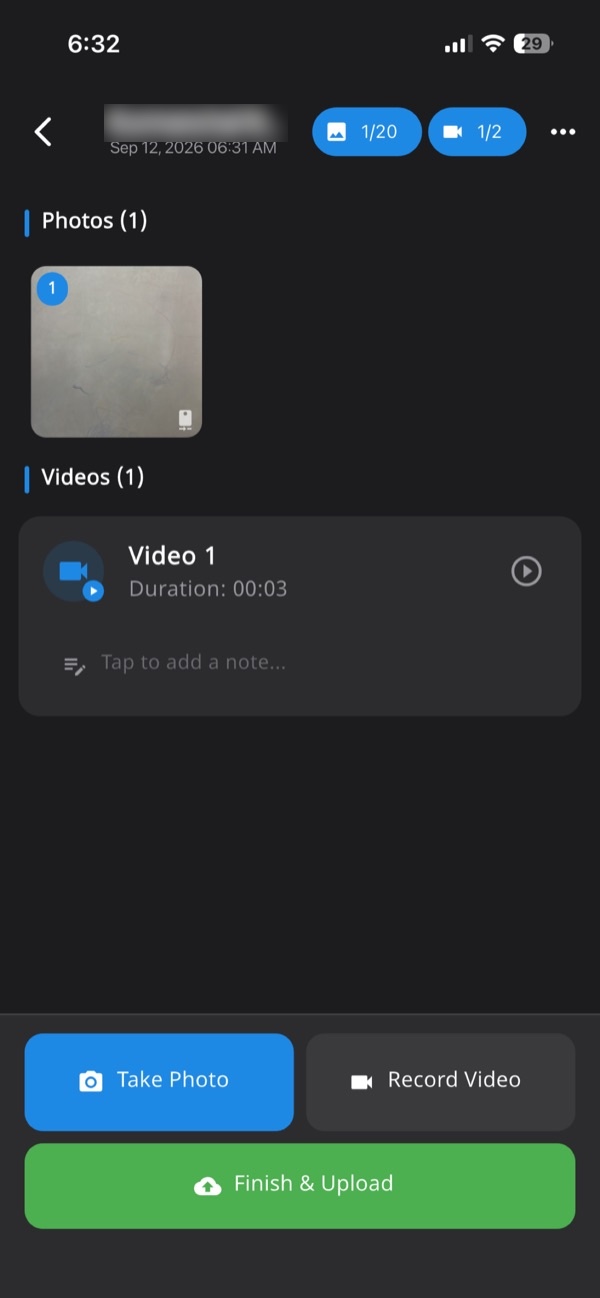
- Open the job in Verafii and start a session for the site. Every photo, video and note lands in that one session, numbered and tied to the site.
- Capture each item with the in-app camera: serial plate, finished unit, wiring, power-on display. There is no gallery upload, and GPS and time are stamped on each photo.
- Add a short video for anything a photo cannot show, such as a lift door cycle. Video can carry audio.
- Add a note against each reading, with the value, unit and instrument. Offline sites are fine: capture works with no signal and uploads when the phone is back online.
- If your company has the customer signature add-on, the customer signs in the app and the signature goes into the report. It is available on request and charged on top of the plan.
- Make the one-tap PDF report before you leave. It carries your customer's logo, location, device, time and a QR code. Reports are in English.
- Send the PDF to the customer. Managers can see the job on the web dashboard and export it.
Anyone can then scan the QR to open a public page and check a Verafii report, with no account and no app.
Can a report be changed afterwards? What it can't show
A Word or Excel file can be edited by anyone who holds it. A PDF can be re-exported. Photos sent over chat lose their location and time. That is why many reports are questioned. Our post on whether a photo's date and time can be changed explains how.
With Verafii, one SHA-256 fingerprint covers the PDF, every photo and every video. Someone checking can drop in the file they received on the verify page. The fingerprint is made in the browser and nothing is uploaded. A match means the file is untouched. Our post on scanning the QR and dropping in the file walks through it.
Be clear about the limits:
- A report shows what was installed and tested on that day. It cannot prove the equipment will keep working.
- Fake GPS is flagged, not prevented. GPS can also drift indoors and in basements, so ask before you accuse.
- A photo cannot show a hidden fault, a wrong reading typed in, or a poor design.
- Whether a customer, insurer or department accepts the report is their decision.
Which installation completion report format to use
Use a simple printed or Excel form if you do a few jobs a month and the customer only wants a signed sheet. Keep the five parts and attach photos yourself.
Use a live-capture report if many technicians work across sites, or if a customer, PMC or claims team may question the visit later. The photos, notes and sign-off then stay in one record that managers can see.
In either case, keep the same headings every time. A customer who sees the same layout on each job finds problems faster.
Frequently asked questions
What should an installation completion report include?
Include job and site details, technician name, date, equipment make, model and serial number, photos of the finished work, test readings, open points and the customer's sign-off. Keep it to one or two pages for a single visit.
Who should sign an installation completion report?
The customer's representative who received the handover should sign, with name, designation, date and any remarks. The technician or supervisor signs for the team. If the customer is absent, record who received it and send the report the same day.
How many photos should an installation report have?
There is no fixed number. Take one clear photo of each installed item, its serial plate and its power-on state, plus a wide shot of the area. Add more only for hidden work or a likely dispute.
Can a customer signature be added in Verafii?
Yes, as an add-on available on request. The customer signs in the app and the signature goes into the report. It is charged on top of the plan, so ask for a quote based on your team.
Can an installation report be edited after it is sent?
An ordinary file can be edited. A Verafii report has a SHA-256 fingerprint covering the PDF, photos and videos. Anyone can drop the file into the public verify page, and a match means it is untouched.
Will Verafii make sure my report is accepted?
No. Whether a customer, insurer or department accepts a report is their decision. Verafii shows what the report contains: live photos with GPS and time, notes, and a QR that anyone can scan to check it.
Try it on your next handover
Start the 30-day free trial, or ask for a quote. The price depends on your team: field agents, admin users, how long you keep evidence, and photo and video quality. Add-ons such as the customer signature are available on request.
