
Take road construction layer wise photos at each stage, before the next layer covers the last one. For every layer, keep a wide view with the chainage board, a close view of the check being made, and a note. This is for road contractors and site engineers who face a quality monitor or engineer. The post covers subgrade, GSB, WMM, bituminous layers, drains and culverts, what to write on site, and what photos can never prove.
Why missing layer records cost time and rework
A road is a stack of layers, and each one hides the last. Once the GSB is under the WMM, nobody can see the GSB. If a question comes up later, the only ways to answer are a core cut, a trench, or a record made at the time.
That is why stage records matter. The PMGSY Quality Assurance Handbook, Volume I describes quality checks by field engineers after each stage of construction, called stage passing. It says the officer who certifies a stage is responsible for the quality and quantity of the work certified. A contractor who cannot show what a layer looked like at passing has little to offer in that conversation.
The cost shows up in three ways:
- Rework: a layer is opened up to check what was already checked.
- Delay: the next layer waits while someone looks for proof.
- Disputes: a running bill (RA bill) for a layer is held because the stage record is thin.
A photo is not the check itself. It is the record that the check happened, where and when.
With a stage record and without
Picture the same road, with and without a record.
| Without a stage record | With a stage record | |
|---|---|---|
| Monitor asks about the GSB | Memory, and a few chat photos | Numbered photos tied to chainage and time |
| Date of the work | Argued from phone clocks | Time stamped at capture |
| Location of the photo | Unknown, often stripped by chat apps | Stamped with GPS at the shutter |
| Next RA bill | Waits for clarification | Stage photos attached to the measurement |
| Rework risk | Higher: layers opened to check | Lower: the record answers first |
The record does not guarantee anyone's decision. It means you start the discussion with facts.
The photo standard: subgrade, GSB, WMM, bituminous layers, drains and culverts
The tests and tolerances come from your contract and the specification. For rural roads that is the MoRD Specification for Rural Roads and the handbook. We did not find a page that sets a photo format for contractors, so your agreement or engineer decides. This is a routine that works for most sites.
For every layer, shoot three views: a wide view along the road with a chainage board, a close view of the check, and one of the finished surface.
Subgrade
Frame the prepared formation with a board showing chainage and layer name. Add the proof-rolling or compaction in progress and any soft spot treated. Show the camber and the edges.
GSB (granular sub-base)
Show the material stacked or spread, the spread width, and the thickness check at a marked point with a scale or peg. Add the roller on the layer.
WMM (wet mix macadam)
Show the mix at the plant or mixing point if you have access, the paver or grader spread, and moisture at laying. Add the finished surface before the prime coat.
Bituminous layers
Photograph the cleaned surface before the tack or prime coat, the sprayer at work, and the laying with the temperature check. Capture the rolling and the finished joint.
Drains and culverts
For culverts, shoot the foundation before concrete, the reinforcement before pouring, and the barrel before backfill. For side drains, show the alignment, the bed level and the lining. These are the most hidden works, so see our post on proof of concealed work photos.
For each stage the same rule holds: shoot it before it is covered.
What to say or write on site
Give the foreman one line: "No next layer starts until the stage photos and note are in."
The note should take ten seconds. Sample notes:
- Subgrade: "Ch 2+300 to 2+500, subgrade proof rolled, one soft patch dug and refilled."
- GSB: "Ch 2+300 to 2+500, GSB 150 mm check at three points, roller 8 passes."
- WMM: "Ch 2+300 to 2+500, WMM laid by paver, moisture checked by the lab technician."
- Bituminous: "Ch 2+300 to 2+450, tack coat applied, BM laying started 11:20."
- Culvert: "Culvert at Ch 2+410, bars checked by AE before concrete."
Only write what was actually done and checked. A note that matches the lab register is worth more than a long one.
Field, office, client
Field
The site engineer or supervisor takes the photos at each stage, adds the note, and confirms that the chainage board is visible. The photo is taken at the place, not at the camp.
Office
The office checks that each layer has its photos before the RA bill goes up. It matches photos to the lab register and the measurement book, and flags any layer with a gap. The daily progress report format can carry the same chainage references.
Client and monitor
The client, PMC or monitor receives a report per stage. On a PMGSY work, the three tiers are in-house control by the executing agency, independent State Quality Monitors, and National Quality Monitors, as set out in the Guidelines on Quality Assurance and Control Mechanism. Works are inspected at initial, middle and final stages, so keep records for each. Your photos are for your own file; the monitors record their own inspections, with geo-tagged photographs, in the official QMS mobile app, as reported in a PIB release.
How to do it with Verafii
Verafii is a camera and report app. It does not upload to PMGSY, the QMS app or e-MARG, and it does not replace any of them. It builds your own record of each stage.
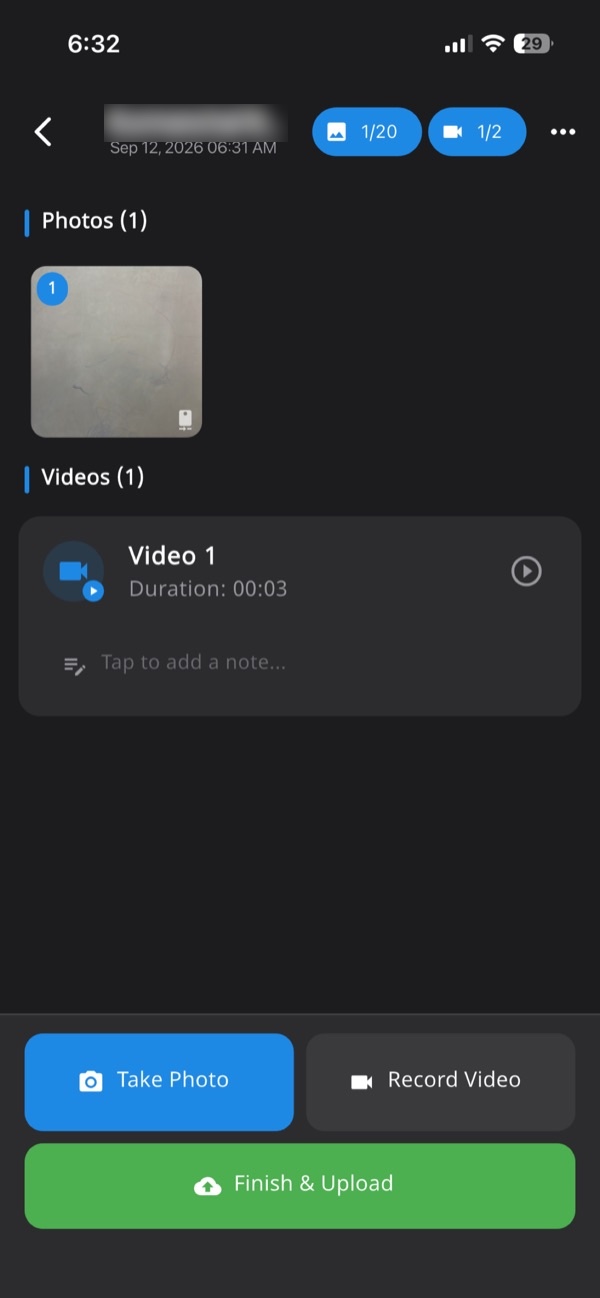
- Open Verafii at the chainage and start a job for the road, so every photo lands in one numbered session tied to the site.
- Place the chainage board in the frame and take the wide view with the in-app camera. There is no gallery upload; photos come from live capture only.
- Take the close view of the check and the finished surface. GPS and time are burned into each photo at the shutter.
- Add your one-line note to the session.
- If there is no signal, carry on. Verafii captures offline and uploads when the phone is back online.
- Before leaving the chainage, make the one-tap PDF report, with your logo, location, device, time and a QR code.
- Send the report to the engineer or PMC.
A photo taken with a fake location is flagged on the photo, the report and the dashboard, on Android and iPhone. Anyone can then scan the QR to check a Verafii report, with no account and no app. For a wider view of site records, see the construction site photo report page.
What photos can't show
Be clear about the limits, and say them to the client yourself.
- Lab results: a photo of a sand-replacement test is not the density result.
- Thickness and compaction: a scale in a photo helps, but measured levels and core results decide.
- Material quality: a photo cannot show gradation, binder content or strength.
- The monitor's inspection: your photos do not replace an independent inspection or a stage certificate.
- Acceptance: whether a department or client accepts any photo is its own decision.
- GPS accuracy: GPS drifts near trees, cuttings and tall structures, so a few metres of difference is not proof of anything. Ask before you accuse.
Checklist for each layer
Before you release the next layer, confirm:
- Board: chainage and layer name are visible in the wide view.
- Wide view: the full width of the layer, along the road.
- Close view: the check being made, with a scale where thickness matters.
- Equipment: roller, paver or sprayer shown working.
- Finished surface: shot before it is covered.
- Hidden works: culvert foundations, bars and drain beds shot before concrete or backfill.
- Note: chainage, layer, check done and who was present.
- Lab link: the photo set matches the lab register entry for that chainage.
- Report: made on site, before the crew leaves.
- Gaps: any missed layer is written down as missed, not recreated.
Frequently asked questions
Which layers should I photograph in road construction?
Photograph every layer before the next one covers it: subgrade, GSB, WMM, each bituminous layer, and drains and culverts. For each, keep a wide view with a chainage board, a close view of the check, and the finished surface. Your contract and engineer decide any further requirement.
What are the three stages of PMGSY quality inspection?
The PMGSY quality guidelines describe inspection of each work at initial, middle and final stages. Quality control runs in three tiers: the executing agency, State Quality Monitors and National Quality Monitors. Check the handbook for the current detail.
Do geo-tagged photos replace lab tests on a road?
No. A photo shows that a check was made at a place and time. It does not show density, gradation, thickness or strength. Lab results, levels and the monitor's inspection stay as they are.
Does Verafii upload photos to the PMGSY QMS app or e-MARG?
No. Verafii does not upload to any government portal and does not replace the official QMS app or e-MARG. It gives you your own record: stamped photos, a numbered job record and a PDF report with a QR.
Can I take layer photos with no mobile signal?
Yes, with Verafii. It captures offline and uploads when the phone is back online. The time and GPS are stamped at capture, not at upload.
Will Verafii make sure my photos are accepted?
No. Whether an engineer, PMC, department or client accepts a record is their decision. Verafii's report shows location, time, device and a verifiable fingerprint, so the reviewer can check for themselves.
How can a monitor or client check a Verafii report?
They scan the QR in the PDF to open a public verification page, with no account or app. They can also drop in the file they received; it is fingerprinted in the browser, and a match means it is untouched.
Try stage records on your next road package
Start the 30-day free trial, with a call at the end to decide whether to continue. Or ask for a quote. The price depends on your team: field agents, admin users, how long evidence is kept, and photo and video quality. Quotes usually go out the same working day.
